SketchUp V-Ray Lighting Logic: Interior Light and Camera

Until the logic of V-Ray interior lighting clicks, no render setting can save an interior. Many users try to light a room with a single Omni Light, and the result comes out dark and blotchy. In this lesson we use an empty room to set up, step by step, how light enters the space. We place Rectangle Lights in the windows, look at the sun’s direction and finally fine-tune with the physical camera.
 YouTube
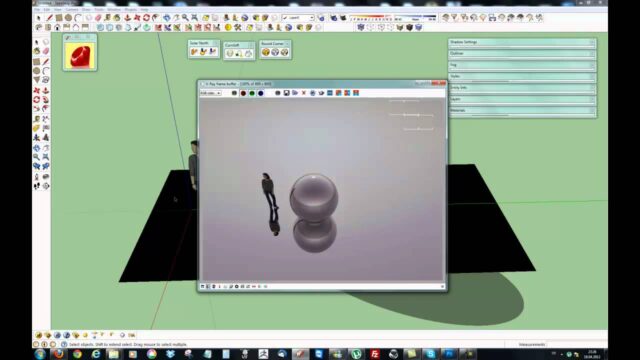
We recorded this lesson in 2012. V-Ray’s light and camera menus have changed since then. But the “bring natural light in through the window” approach is still the foundation of interior rendering. (The video is in Turkish; this guide walks through the key steps in English.)
In this video
- We explain why the Omni Light is not the main light.
- We place a Rectangle Light in each window.
- We show which side of the light emits light.
- We check the light falloff with quick test settings.
- We make the lights invisible and raise their intensity.
- We add the final touch with ISO and shutter speed on the physical camera.
Why isn’t an Omni Light enough?
An Omni Light is a point source that spreads light equally in every direction. So it is not suited to lighting a whole room. We only use it as a fill light in corners where little light falls. For the main light, we recommend the Rectangle Light instead.
V-Ray interior lighting logic: light comes in through the windows
For example, our room has skylights and regular windows. We place a separate Rectangle Light for each window. In total we use four lights, because in reality natural light enters through these openings. Sunlight will also come in through the windows separately.
Set up the same logic in your own projects. First identify the openings where the space receives light. Then place a Rectangle Light of the right size in each opening.
Which side of the light emits light?
One side of a Rectangle Light is white and the other is gray. The most important rule here is this: only the white side emits light. If you right-click the light and turn on the Double Sided option in the Edit Light window, both sides emit light. But we do not want that for a window light. So we turn the white side toward the inside of the room.
Quick test settings for V-Ray interior lighting
We turn the settings down to see the light falloff. For Color Mapping we choose Reinhard. We set the output size to 640×480. Otherwise, even a test render of a room full of furniture takes hours.
In the Indirect Illumination section, GI stays on. We use Monte Carlo as the secondary engine. We had also read a note in V-Ray’s own manual saying this engine does well in comparisons. We leave the Subdivs value at 8 for now.
Why is the first render dark?
The first test render comes out dark. There are two reasons. First, the sun is not at an angle to come in through this window. Second, the Rectangle Lights’ intensity is at the default value of 1, which is far too low.
Do not worry about the blotches in the render for now. The settings are low on purpose and there are no materials in the scene. Here we only look at how the light falls.
V-Ray interior lighting logic: invisible lights and intensity
We left a mistake in the first render on purpose: the Rectangle Lights show up in the camera like white panels. If the floor is parquet, these panels also reflect on the floor. To prevent this, we right-click the light and open the Edit Light window. Then we check the Invisible option.
Then, in the same window, we raise the Intensity value from 1 to 20. We apply this to all four lights. In the new render, light clearly comes inside. The window panels are also no longer visible. That gives the room a more natural light.
The sun’s direction
The next step is aiming the sun relative to the window. Right now the sun enters the room at a diagonal angle. By changing the sun’s position, you can make the light fall on different surfaces. If there is a window behind the camera, you can add a Rectangle Light there too.
The final touch with the physical camera
V-Ray’s physical camera carries the settings found on professional cameras. The camera section has F-number, Zoom Factor, Film Speed (ISO) and Shutter Speed values. In the video we focus on ISO and shutter speed.
Film Speed, or ISO, adds artificial brightness to the scene. In the video we raise the ISO value to 400. This time the room becomes noticeably brighter and the light filtering through the window increases. But at high values like ISO 800, the image blows out and turns white.
How Shutter Speed works
Shutter Speed represents how long the lens stays open. If you raise the value, the lens closes faster and the scene gets darker. If you lower the value, more light comes in and the scene gets brighter. For example, a value of 100 gives a much brighter result than a value of 800.
ISO and shutter speed are also linked. If you lower the shutter speed and raise the ISO, the light becomes far too much. So use the two in balance. We recommend adjusting these two settings last.
A working order for V-Ray interior lighting
- Identify the space’s windows and the openings where it receives light.
- Place a Rectangle Light in each opening with its white side facing in.
- Make the lights invisible and raise their intensity.
- Set the sun’s direction relative to the window.
- Add an Omni Light as fill in the corners that need more light.
- Finally, fine-tune with ISO and shutter speed on the physical camera.
Hardware also has a big effect on the result. On a weak laptop, even test renders take a long time. Our render computer article will guide you on this. For details on the Rectangle Light, see our V-Ray Rectangle Light lesson, and for camera settings, our physical camera lesson. For the current V-Ray, visit the official V-Ray for SketchUp page.
Summary
In this lesson we set up the logic of V-Ray interior lighting in an empty room. Instead of an Omni Light, we placed a Rectangle Light in each window. We made the lights invisible and raised their intensity to 20. We looked at the sun’s direction. Finally, we fine-tuned with ISO 400 and shutter speed on the physical camera.
Frequently asked questions
When should I use an Omni Light in V-Ray interior lighting?
Use it only as a fill light in corners where the light is not enough. For the main light, place Rectangle Lights in the windows.
Why does the Rectangle Light look like a white panel in the window?
Because the light’s Invisible option is off. Check Invisible in the Edit Light window.
When should I raise the ISO on the physical camera?
Raise it after you have set up the lights and the sun, if the scene is still dark. A very high ISO blows out the image.