SketchUp V-Ray 6 Render: A High-Quality Interior Image

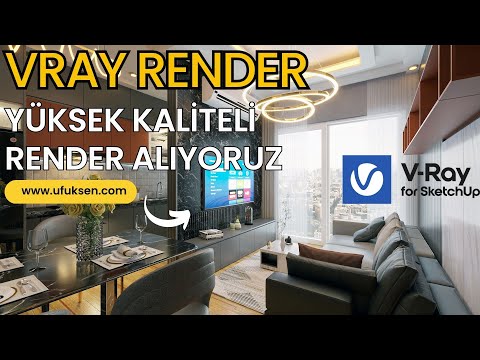
In this V-Ray 6 interior render lesson, we visualize the apartment we drew in our interior floor modeling series, this time with V-Ray. We had already rendered the same model with Twinmotion, Enscape and D5 Render. When V-Ray came out ahead in the community poll with 162 votes, we prepared this long lesson. It is a step-by-step project for those who put quality ahead of time.
 YouTube
We recorded this lesson in 2023 with V-Ray 6. So the menu locations are a little different in newer versions. Still, the lighting and material logic we explain holds true. (The video is in Turkish; this guide walks through the key steps in English.)
In this video
- Setting up the glass, curtains and fill lights
- Getting ready-made materials from the Cosmos library
- Placing a view photo outside the window
- Building ambience with LEDs, spotlights and a light strip
- Exposure, contrast and lens effects in the frame buffer
How a V-Ray 6 render differs from other engines
First, let’s set realistic expectations. In V-Ray every step takes a little longer. For example, we finished a 4K render at full quality in about an hour and a half. In the other engines, a 4K image comes out in seconds. That is why we use a 1920 x 1080 resolution for tests.
Because it runs inside SketchUp, the menus also lag from time to time. But when it comes to quality, V-Ray is still unquestionably strong. We covered the comparison of the engines in detail in our D5, V-Ray and Enscape comparison.
Glass and fill lights
The first job is to check the glass. In the glass material, the diffuse color should be black. We also keep the opacity low. The shine comes from the Reflection and Refraction layers.
Then we put a Rectangle Light in each window. We right-click the light and use Flip to point it into the room. That way we support the light coming through the window. We leave the light intensity at 30.
We do not want these lights to show in the render. So we tick the Invisible option in the Options section. Otherwise you will see a glowing panel behind the curtain.
A ready-made curtain material from Cosmos
Making a curtain material from scratch takes a long time. Instead, we download a curtain model from the Cosmos library. Its preset material comes into the scene along with the model.
Then we select that material in the Asset Editor and right-click it. With a command like Select Objects, we apply it to our own curtain. On organic models this can take a few seconds. For general Cosmos use, see our using Cosmos article.
LED strips and the TV screen
The LED strips in the scene use an emissive material. We copy the light layer of one LED material and paste it onto the others. We set the intensity between 5 and 30 depending on the situation.
We also place an image on the TV screen and give it a little light. Then we fit the image to the screen exactly with Texture Position.
V-Ray 6 render settings
In the render settings we keep the quality at Medium. In the camera section we set Exposure and White Balance to Auto. For the test render we bring the resolution down to 1280 x 720. We also turn on the Denoiser option.
Those with an NVIDIA card can run the CPU and GPU together in CUDA mode. But for tests we recommend sticking with the CPU. Save hybrid mode for the final render.
The view through the window
An empty sky through the window weakens the scene. So we draw an arc-shaped surface outside the building. We will map a city photo onto this surface.
We find the photo on free stock photo sites. It is important to choose a viewpoint that matches the apartment’s floor. Then we open a new material and assign the photo to it. When you choose Triplanar Projection in V-Ray’s UV tool, the image sits cleanly on the surface.
Editing a V-Ray 6 render in the frame buffer
While the render runs, we use the layers panel on the right of the frame buffer. In the Exposure layer, pulling the Highlight Burn value to the left reduces the blown-out areas in the background. Raising the Exposure value a little brightens the interior.
Then we adjust the tone with the Contrast, Curves and White Balance layers. When you turn on Lens Effects, a soft glow comes into the image. If the Intensity and Size values feel too strong, lower them. For details on the frame buffer, take a look at our frame buffer lesson.
Swapping materials with Cosmos
For the floor we download a parquet material from Cosmos. We try black stone on the kitchen countertop and different patterns on the marble surfaces. We make the outside of the spot fittings chrome and the plastic parts orange.
The biggest advantage of these ready-made materials is that they come with their own settings. So we do not have to deal with reflection and roughness settings separately. For the ceiling we choose a white plaster material. When we lower the Bump value from 0.9 to 0.35, the surface looks more natural.
Light strip, spotlights and color temperature
We place a thin Rectangle Light in the gap in the suspended ceiling. We turn it so the arrow points down. We set its intensity to 10, then 5, and turn on the Invisible option.
To keep the light color warm, you can choose a Kelvin value between 2500 and 3000. We raise the spotlight intensity to 1500. We set the sun intensity to 0.5 and turn its direction about 90 degrees.
After every change we run a short test render, because you only strengthen a scene by testing it constantly.
Time and result
By the end of the lesson, it comes to about 45–50 minutes of work. In the other engines the same job can be done in 15–20 minutes. On the other hand, in our view V-Ray’s light and material quality is ahead.
Even at the Medium setting we get a clean image in a short time. If you raise the settings, the noise drops even further.
Summary
In this V-Ray 6 render lesson we set up the glass, curtains, LEDs and light strip. We refreshed the materials quickly with Cosmos materials. We put a view outside the window and made the final touches in the frame buffer. For the current version, see the official V-Ray for SketchUp page.
Frequently asked questions
Why is a V-Ray 6 render slower than other engines?
V-Ray calculates light in more detail and runs inside SketchUp. So the menus and 4K renders take longer.
Why do we make the window lights invisible?
The fill lights are only there for lighting. If the Invisible option stays off, a glowing panel shows in the render.
Which resolution should I choose for V-Ray 6 test renders?
For tests, 1280 x 720 or 1920 x 1080 is enough. Raise the resolution for the final render.