Practical V-Ray Tips: V-Ray Render Settings and Tricks

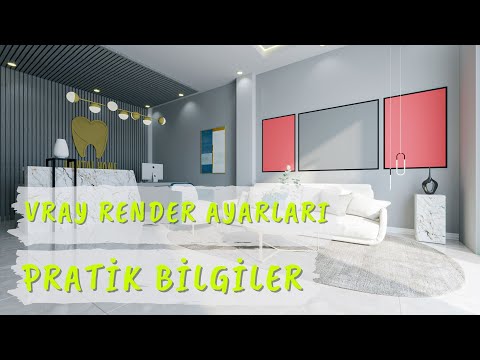
When people hear practical V-Ray tips, most of them rush straight to the quality settings. Yet the secret of a quality render lies in the light and the camera, before any V-Ray render settings. In this lesson we build a systematic working order using a dental clinic entrance scene. We analyze the scene, place the camera, add the lights and only touch the V-Ray settings at the very end.
 YouTube
We recorded this lesson in 2022 with the V-Ray 5 era interface. The menu locations have changed a little in newer versions. But the working order and the lighting logic still apply in the same way. (The video is in Turkish; this guide walks through the key steps in English.)
In this video
- We analyze the scene and decide on the light sources.
- We set the camera angle and two-point perspective.
- We use a small output size for test renders.
- We adjust the exposure and white balance.
- We fix two common mistakes with the glass material and window lights.
- We complete the scene with the sun, LEDs and spotlights.
- We add the final touch with VFB layers.
Practical V-Ray tips: analyze the scene first
We set aside the materials and model layout and focus on the light first. If you can’t get light into the space efficiently, you will always have problems. On a laptop or a below-average computer especially, this difference becomes huge.
First we think about where the light will come from in the scene. There are spotlights on the ceiling. We can give these spots LED lighting. Sunlight will also come in through the glass. We place the extra light sources based on this analysis as well.
Camera placement comes before everything
If your camera doesn’t show the area you want to show, even the highest quality render means nothing. Sometimes in renders, half an armchair is cut off and an important part of the space is out of frame. So the first job is to put the camera in the right position.
In the video we start the field of view at 35 degrees. When we can’t see the whole space, we raise it to 65 degrees. Then we notice that the vertical lines aren’t parallel. For this we choose Two-Point Perspective from the Camera menu. Finally we save the view as a scene.
Practical V-Ray tips: a small output for testing
In the V-Ray settings window, all the quality settings are gathered in one place. But the most important part is the output size in the lower section. Use a small size like 800×450 for test renders. Otherwise, no matter how powerful your system is, you will get stutters during rendering.
In the first test render, sunlight comes in, but it isn’t enough. We will boost it with extra lights, or with the sun’s direction or intensity.
Practical V-Ray tips: exposure and white balance
The Exposure setting in the camera section balances the amount of light inside. If you leave it on auto, V-Ray picks the value itself. We set the value to 12 by hand. In our experience, 11 to 12 is a good starting point for many scenes. When we lower the value to 10, the scene gets blown out.
We set White Balance to auto. That reduces the color shift and blowout on white surfaces. These settings will feel very familiar if you use a camera.
Two common mistakes with glass and window light
To light the interior, we place a Rectangle Light in front of the two glass doors. We turn the light to face inward and make a copy with Ctrl. There are two common mistakes here.
The first mistake is not assigning a real glass material to glass objects. If the glass material is wrong, light doesn’t get in and the render comes out dark. We assign one of the Glass materials from the library to all the glass. The second mistake is not checking the Invisible option in the light settings. Otherwise you see a bright white panel behind the glass.
When we raise the window light intensity from 30 to 60, the dark areas on the ceiling become bright. If some spots get slightly blown out, we fix them with the Highlight Burn value in the VFB’s Exposure layer.
Shutter speed and quality settings
The physical camera also has a Shutter Speed setting. This value represents how long the lens stays open. When you set it to 100 instead of 300, more light comes in. But most of the time you solve the problem with Exposure without going into these details.
The quality settings are similar. V-Ray largely manages sections like the noise limit, antialiasing and color mapping automatically. Your real job is to build a quality scene, correct lighting and a balanced environment.
Sun, LEDs and spotlights
When the sun comes in, it creates a very sharp patch of light on the floor. To soften it, we raise the sun’s Size Multiplier to 5. As a result we get softer, more pleasant sunlight.
For the LEDs on the ceiling, we pick the material with the eyedropper. Then we give it a light-emitting material. Because it is a component, the change applies to all the LEDs at once. We also add a spotlight to see light reflected on the wall. We adjust the spot’s power with test renders and turn it toward the wall.
Practical V-Ray tips: the final render and the VFB
For the final, we raise the resolution to 1920×1080. We also turn on the denoiser. As the render device, we choose the mode that uses the CPU and the graphics card together. That way the render progresses faster. In the video, after about 8 minutes we find the quality good enough and stop the render.
Then we play with layers in the V-Ray Frame Buffer (VFB). We liven up the colors a little with contrast and saturation. With Bloom/Glare in the lens effects, we give the lights a soft glow. But we recommend not overdoing these effects.
Summary
In this lesson we applied practical V-Ray tips in a systematic order. First we analyzed the scene and placed the camera with two-point perspective. We tested with a small output and set the exposure to 12. We fixed the glass material and invisible window light mistakes. Finally we softened the sun and finished the image in the VFB.
To go deeper into the camera topic, see our camera placement article. The details of the settings are in our V-Ray render settings lesson. For the VFB, our V-Ray Frame Buffer lesson is a good next step. For the current version, visit the official V-Ray for SketchUp page.
Frequently asked questions
Which of these practical V-Ray tips matters most?
Setting up the light and camera before the settings. If light doesn’t get in efficiently, quality settings alone won’t help.
What should I set the Exposure value to?
We used 12 in the video; 11–12 is a good starting point for many scenes. If it gets blown out, raise the value.
What should I check if no light comes through the window?
Check that you assigned a real glass material to the glass. Also check the Invisible option on the window light.