Realistic Glass with SketchUp V-Ray: A Fresnel Glass Material

A Fresnel glass material is one of the methods that gives the most realistic glass in V-Ray. You will find many different glass recipes online. But when you set up the reflection with Fresnel, the glass shines naturally depending on the viewing angle. In this short lesson we build such a glass from scratch and test it in a simple scene.
 YouTube
We recorded this lesson in 2012. So the menus of the V-Ray material editor have changed in newer versions. Still, the logic of Fresnel reflection is the same today. (The video is in Turkish; this guide walks through the key steps in English.)
In this video
- The realism Fresnel reflection adds to glass
- Creating a new material and removing the Diffuse layer
- Connecting a Fresnel map to the Reflection layer
- Refraction settings: color multiplier, shadows and alpha
- Applying the material correctly to an object inside a group
What is the Fresnel effect?
In the real world, when you look straight at glass, you can easily see what is behind it. But when you look at glass from a side angle, the reflection clearly increases. This physical behavior is called the Fresnel effect.
Glass with a fixed reflection value does not show this difference. Because it looks equally shiny from every angle, it looks fake. A Fresnel glass material, on the other hand, adjusts the reflection to the angle automatically. That makes the render more convincing. We explained the physics behind this in our physics of how materials work article.
Setting up the test scene
We prepare a simple model. We place a circular object behind the glass. That way we can easily see how the image behind the glass is refracted. For the glass, we will use a thin plane.
You can apply this lesson to your own models exactly as shown. For example, the same settings work for a window, a shop window or a glass tabletop.
Creating a Fresnel glass material
We open the V-Ray material editor and create a new material with Create Material > Standard. We name it “glass 2” so it does not get mixed up with the old material.
Then we remove the Diffuse layer, because we do not need it for glass. Next we add a Reflection layer from the Create Layer menu. As you may remember, Reflection means reflection and Refraction means transparency.
The Reflection setting for a Fresnel glass material
We press the M button in the Reflection layer and choose the Fresnel map. This map has index of refraction (IOR) settings. Every material has its own value. For example, metal, aluminum, glass and diamond work with different values.
In the video we use a value of around 1.55 for glass. The index of refraction of real glass is also around 1.5. When we confirm and press the Preview button, we see the reflection in the preview.
Refraction settings in a Fresnel glass material
Now we add the transparency. We open a Refraction layer from the Create Layer menu. Once the layer is added, the material becomes transparent in the preview.
At minute 3 of the video, we touch three settings in this layer. We set the Color Multiplier to 0.5. Then we check the Affect Shadows and Affect Alpha boxes.
Affect Shadows lets light pass through the glass. That way the glass casts a light, soft shadow instead of a pitch-black one. Affect Alpha makes what is behind the glass show up correctly in the alpha channel. This setting helps when you edit the render in Photoshop afterward.
Applying the material and a test render
We select the object and right-click the material. Then we choose Apply Material to Selection. On the first try the material does not apply, because the object is inside a group. When we enter the group and select the faces, the material applies without a problem.
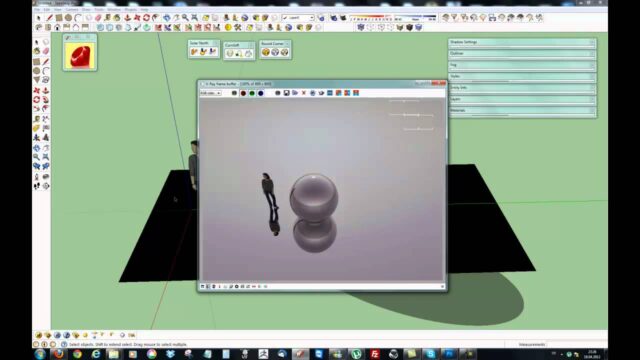
Then we take a test render. The glass refracts the object behind it naturally and shines slightly at the edges. This render can take a while; be patient. In the video we also show an image we prepared earlier with the same values.
Tips for a Fresnel glass material
- Model the glass with thickness wherever possible; a single-face plane shows refraction incompletely.
- If you want colored glass, use the Fog Color setting in the Refraction section.
- Keep Affect Shadows on for window glass so the shadows do not go dark.
- Choose a low resolution for tests, because glass increases render time.
You can find more details on reflective surfaces in our reflective surfaces lesson.
Summary
In this lesson we built a Fresnel glass material. First we removed the Diffuse layer and connected a Fresnel map to the Reflection layer. Then we set the color multiplier, shadow and alpha settings in the Refraction layer. Finally, we applied the material to the glass inside the group and rendered. To build your own materials from scratch, see our material from scratch lesson. For the current V-Ray, visit the official V-Ray for SketchUp page.
Frequently asked questions
Why is a Fresnel glass material more realistic?
Because it changes the reflection with the viewing angle. Seen straight on, the glass looks transparent; from a side angle it looks shinier, and real glass behaves the same way.
Why does the glass cast a pitch-black shadow?
Most likely Affect Shadows is off in the Refraction layer. When you check this box, light passes through the glass and the shadow gets lighter.
Why won’t the material apply to the object?
The object is most likely inside a group or component. Enter the group, select the faces and apply the material again.