Photoshop Light Beam Through a Window and Post-Render Adjustments

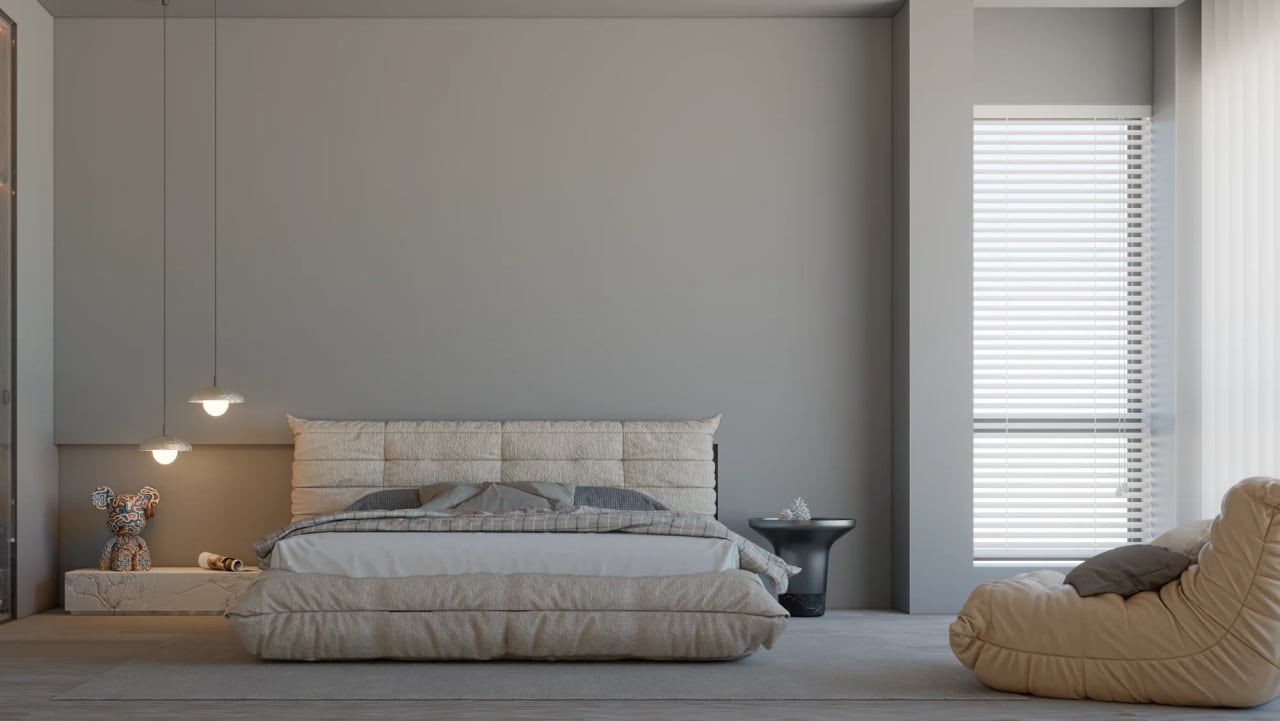
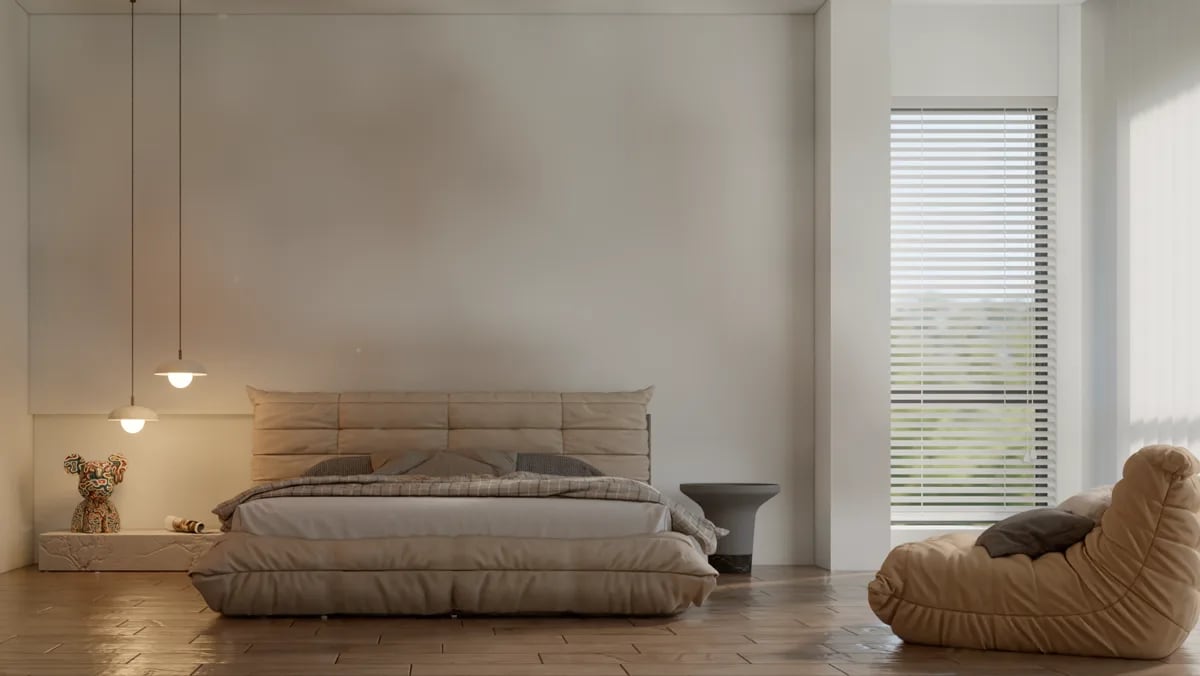
A Photoshop light beam effect is the easiest way to add sun filtering in through a window after rendering. In this lesson we work on a finished interior render. We create a soft band of light falling from the window onto the floor, then balance the overall light and colors of the image. Anyone who does post-production on renders can apply this technique in a few minutes.
 YouTube
We recorded this lesson in 2012. Photoshop’s interface has changed since then. However, the logic of layers, masks and filters has stayed the same. (The video is in Turkish; this guide walks through the key steps in English.)
In this video
- opening a new light layer on the render image,
- drawing the area where the light will fall with the Polygonal Lasso tool,
- filling the area with white and softening it with Gaussian Blur,
- fading the light out with distance using a mask and a gradient,
- making the final adjustments with Levels, Curves, Exposure and Vibrance,
- adding a simple frame to the image.
Preparing the layer for the light beam effect
First we open the render image in Photoshop. The Background row in the Layers panel comes locked. We double-click it and click OK to unlock it. The layer’s name becomes Layer 0. Then we add a new, empty layer. This layer should sit above the render image.
Drawing the area for the light beam effect
We choose the Polygonal Lasso tool. Starting from the edge of the window, we draw an area up to the point where the sun will fall on the floor. This area is really the rough shape of the light band. Then we open the Fill command from the Edit menu. Its shortcut is Shift+F5. We choose white as the fill color and click OK.
Softening with Gaussian Blur
Right now there is a white patch with hard edges. Real light, though, softens at the edges. So we apply the Gaussian Blur filter under Blur in the Filter menu. We find the value by trial. As the value increases, the light looks blurrier and more spread out.
The light beam effect with a mask and a gradient
The light should weaken as it moves away from the window. For this, we add a layer mask to the light layer. Then we choose the Gradient tool and pick the black-to-white transition. With the mask selected, we drag a line across the drawing from one end to the other. That way the light stays strong at one end and fades out at the other.
When we are done with the mask, we remove it with the trash can icon in the Layers panel. Then we open Gaussian Blur once more. If you bring the value close to zero, the edge of the light gets sharp. If you raise it, the light gets very blurry. You can see this difference live at the fourth minute of the video.
Opacity and Fill settings
At this point the light still looks too bright. We soften it with the Opacity or Fill value in the Layers panel. In the video we chose a low value of about twenty percent. Toggle the layer on and off to compare the before and after. This small touch adds noticeable life to the image.
Post-render light and color adjustments
At the fifth minute of the video, we select the render layer and go to the Adjustments section of the Image menu. There are a few basic adjustments here:
- Levels (Ctrl+L): you open up the image’s tonal range with the white slider on the right and the black slider on the left.
- Curves: does the same job with more control; you balance the light inside the room by nudging the curve slightly.
- Exposure: raises or lowers the overall exposure of the scene.
- Vibrance: increases color saturation; for example, blue tones stand out.
- Hue/Saturation: strengthens a specific color tone separately.
In each window, toggle the Preview box on and off to check the difference. But do not overdo it. Light pushed too far causes blown-out areas, in other words white patches, in some regions.
Adding a simple frame
At the end of the lesson we add a frame to the image. We open the Canvas Size window from the Image menu and add a few units to the width and height. We merge the visible layers and repeat the same step with a larger value. We paint the resulting transparent edge black with the Paint Bucket tool. That way a clean frame forms around the image.
For a faster editing workflow, see our Photoshop post-render edits article. V-Ray users should also watch the V-Ray post-render editing lesson. You can also set up the light directly in the render. For example, the sun settings in V-Ray for SketchUp give a similar effect.
Summary
For the light beam effect, draw the light area on a new layer and fill it with white. Soften it with Gaussian Blur, then fade it out with distance using a mask and a gradient. Finally, lower the Opacity value. Then set the overall balance of the image with Levels, Curves and Vibrance.
Frequently asked questions
Should the light beam effect be done in the render or in Photoshop?
Both are possible. The Photoshop method is fast and does not add render time, while setting it up in the render gives a more physical result.
Why does the light look artificial?
Usually the edge is too sharp or the opacity is too high. Raise the Blur value and lower the Opacity value.
What is the difference between Levels and Curves?
Levels makes quick adjustments with three sliders. Curves lets you control the tonal range more finely through a curve.