Realistic Interior Bedroom with Enscape Render

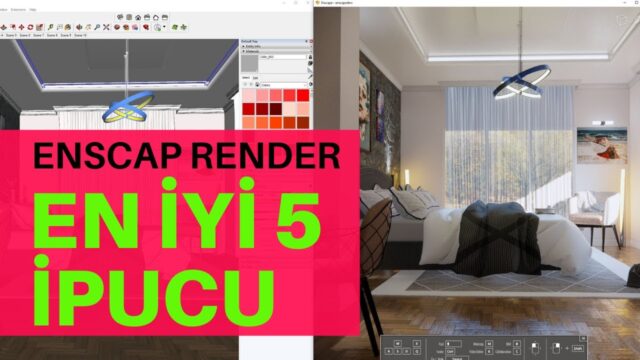
In our Enscape bedroom render lesson we start from a reference image. First we model the main outlines of the bedroom in SketchUp. Then we visualize everything else with Enscape’s ready-made library assets. This gives us a realistic interior scene in a short time.
The lesson is long and hands-on, running about 67 minutes. So we recommend keeping your own model open while you watch. You can share the work you do in the lesson in our Facebook group.
Enscape bedroom render lesson video
 YouTube
Why work from a reference image?
A reference image makes clear from the start what you are going to do. You read where the light comes from, the colors of the materials and the furniture layout from a ready example. That way you do not sit undecided in front of an empty screen. And by comparing your own result with the reference, you spot what is missing right away. (The video is in Turkish; this guide walks through the key steps in English.)
When choosing a reference, pick a photo with good, clear light. Start with a simple bedroom instead of very complex scenes. Especially in your first attempts, a room with few objects makes learning easier.
Rough modeling in SketchUp
In this lesson we model only the main outlines in SketchUp. Basic elements like walls, window openings, floor and ceiling belong to this stage. We do not get into detailed furniture modeling. The Enscape library covers most of that need.
- Scale: Work close to the room’s real dimensions, or the library objects will look out of proportion.
- Windows: Open the gaps where daylight will come in at the right place.
- Groups: Keep the walls, floor and ceiling in separate groups.
- Material names: Give every surface a meaningful material name.
A bedroom scene with the Enscape library
When the rough model is ready, we open the Enscape window. We add the bed, nightstands, lamps, rug and decor objects to the scene from the library. These objects are drawn in high detail at render time, but they do not make the SketchUp model heavy. So the file stays light and the work moves smoothly.
We also replace the materials with ready options from the library. Surfaces like parquet, fabric and paint get a realistic look in a few clicks. Then we fine-tune the reflection and roughness values for the room.
Light and atmosphere in the bedroom
A bedroom is a place to rest, so it calls for warm, soft light. Make the daylight coming through the window the main source. Then create warm spots with artificial lights such as bedside lamps. But do not make the lights too strong, or the room will look uncomfortably bright.
Color temperature also sets the atmosphere. Slightly yellow tones create a peaceful feel. Cool blue tones, on the other hand, make the room look more formal. In short, choose the light based on how the room is used.
Enscape bedroom render settings and camera
We usually place the camera at eye level or slightly lower. We put the bed at the focus of the frame and distribute the surrounding details evenly. We also make sure the vertical lines stay straight.
For the final output, choose the resolution based on how you will use it. High resolution works for presentations, and a medium value is enough for social media. To try it in a different room, take a look at our kids’ room modeling and render lesson. For another interior example with Enscape, check our Enscape interior render post.
You can find current information about the program and the library on Enscape’s official page.
Enscape bedroom render practice
After finishing the lesson, try the same method on your own design. First pick another bedroom photo you like online. Then build the main outlines of the room in SketchUp and fill the space with the Enscape library. This repetition makes what you learned in the lesson stick.
On your second attempt, change the color palette. For example, reinterpret a light-toned room with dark wood and navy walls. You will see how light behaves with different colors. A night scene is also a good exercise. A room lit only by lamps is the best way to learn artificial lighting settings.
Save the images in a folder after each attempt. When you put your first and latest work side by side a few weeks later, you clearly see your progress. That becomes a nice source of motivation to keep practicing.
If you are working on something similar, our Enscape 3.1 Exterior Render and Quality Exterior Visualization with Enscape Render posts will save you time. For other lessons, visit our SketchUp render guide.
Frequently asked questions
Do I need detailed furniture modeling for an Enscape bedroom render?
No, the ready-made furniture in the Enscape library covers most needs. You only model the main outlines of the room.
Do library objects make the file heavy?
No, these objects sit in SketchUp as a lightweight placeholder. Their detailed versions only appear in the Enscape window.
What level is the lesson for?
Anyone who knows SketchUp’s basic tools can follow the lesson comfortably. It is also a good start for first-time Enscape users.