Exterior Render Tutorial: The Complete Enscape Walkthrough

This Enscape exterior render tutorial takes a residential scene from start to finish. We recorded the lesson in 2022 with Enscape 3.0; some menu names have changed in newer versions. Still, the core logic has stayed the same. We made it for architects, interior designers and students who want to present their projects quickly and effectively.
 YouTube
What’s in this video?
- Setting up light and tone with an HDRI
- Automatic bump and reflection from the albedo image
- Grass, glass and metal materials
- Vehicles, plants and street elements from the library
- A dirt effect on the walls, plus spotlights and IES profiles
- Panoramas, batch rendering, animation and Photoshop post-processing
Preparing the scene for the exterior render tutorial
In the first lesson we send the model to Enscape. But before that, you need to plan the trees, vehicles and landscape elements. A render engine can’t rescue a weak scene on its own. When you press the Start Enscape button, the preview window appears right away. (The video is in Turkish; this guide walks through the key steps in English.)
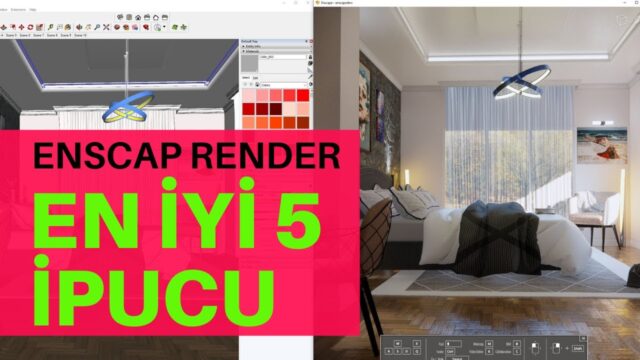
If you work with a single monitor, put the two windows side by side. Then turn on the camera sync button. That way the Enscape view turns as you move around in SketchUp. On the Enscape side, you move around like in a game with the WASD keys and the left mouse button.
Lighting with an HDRI in the exterior render tutorial
At minute 5 of the video we open the Visual Settings window. In the Sky section we set the source to Skybox and load our own HDRI file. We recommend downloading a few files from free HDRI sites and trying them in the scene. Each HDRI changes the color of the scene and the softness of the shadows.
The most critical setting is the Brightest Point as Sun Direction checkbox. It ties the sun to the brightest point in the HDRI. If you forget it, errors show up in the shadows and reflections. Then we turn the background with Rotation to find the right angle.
In the Atmosphere section we reduce the fog and increase clarity. We also lower the sun brightness quite a bit. That way we get a soft tone close to an overcast sky. In the Image section we strike a balance with the contrast, shadow and highlight values.
Camera, color temperature and the first 4K output
In the third lesson we turn on Two Point perspective. This setting straightens vertical lines and shows the facade correctly. We also choose the field of view to suit the scene. For color temperature, the 6400–6600 K range gave good results in this scene.
You can also turn off the Auto Exposure and Auto Contrast checkboxes and set the values by hand. We took this route to brighten the shaded area, for example. Then we set the output to Ultra HD, that is, 4K. Even the first image, taken without touching the materials at all, was ready in a few seconds.
Materials, grass and the library
In the fourth lesson we go over the materials one by one. We pick a material with the eyedropper and open the Enscape material editor. The Use Albedo option in the Bump and Reflection channels produces bump and reflection without needing separate maps. For metals we lower the roughness and raise the metallic value. For glass we play with opacity and color.
For grass, setting the material type to Grass is enough. But if you make it too tall, the grass turns into a carpet. Then we add vehicles, plants and street elements from the Enscape Asset Library. These models are proxies, so they don’t weigh the scene down. Don’t forget to save often, either; SketchUp crashed once in the video.
Dirt effect, lights and wind
At minute 47 of the video we add a dirt effect to the walls. We import a black-and-white dirt image as an image and make it a component. In the material, we turn on transparency and assign the same image as a mask, inverting it if needed. Moving the image half a centimeter in front of the wall prevents flickering.
On the lighting side, there are point, spot, line, rectangle and disk lights. You can load an IES profile you find online into a spotlight. To change a light’s color, just drop a color onto the light with the Paint Bucket. The wind setting in the atmosphere also sways the trees gently in animations.
Exterior render tutorial: panoramas, batch rendering and animation
This exterior render tutorial doesn’t stop at still images. The Panorama button captures the scene in every direction and uploads it to Enscape’s web viewer. You send the client a link, and they look around from their phone. A standalone exe export lets them walk through the scene; but with large scenes, the file gets heavy.
You can render your saved views all at once with batch rendering. For animation, you add camera keyframes and set the duration. We recommend 60 frames per second for a smooth image. It is easier to export the parts separately and join them in a video program.
The final touch in Photoshop
In the last lesson we also export the white model and material ID outputs. The material ID gives each surface its own color. That way you can easily select the sidewalk or a wall in Photoshop. Using the white model on top with Multiply or Soft Light brings out the corner shadows. Then we fine-tune the temperature and tones with Camera Raw.
Summary
In short, this exterior render tutorial shows the whole journey of a scene. We set up the light with an HDRI and speed up the materials with Use Albedo. Then come the landscaping, the dirt effect, panoramas, animation and Photoshop. To take the topic further, see our quality exterior visualization with Enscape article. For model organization, our working principles before sending to a render engine article is also useful. For current release information, the most accurate source is the official Enscape page.
Frequently asked questions
Is this exterior render tutorial still useful in newer versions?
Yes, the core logic is the same. But some menu names and the library structure have changed in newer versions.
What does Use Albedo do?
It automatically produces bump and reflection maps from the base color image. That way you get fast results without hunting for separate maps.
How do I send the panorama to a client?
You upload the panorama to Enscape’s web viewer and copy the link. The client opens that link on a phone or in a browser.