SketchUp Ramp Plugin: Ramp Studio Builds Ramps Without Slope Calculations

The level difference is sixty centimeters, and the entrance door is seven meters away. The client wants glass railings on both sides, and the municipal presentation is on Thursday. Meanwhile you’re writing slope calculations on paper and sweeping the path with Follow Me for the second time. For every architect who has lived this scene, a good SketchUp ramp plugin brings the most peace of mind. That’s why Ramp Studio exists: you draw the line, and a ramp with railings and a controlled slope is ready.
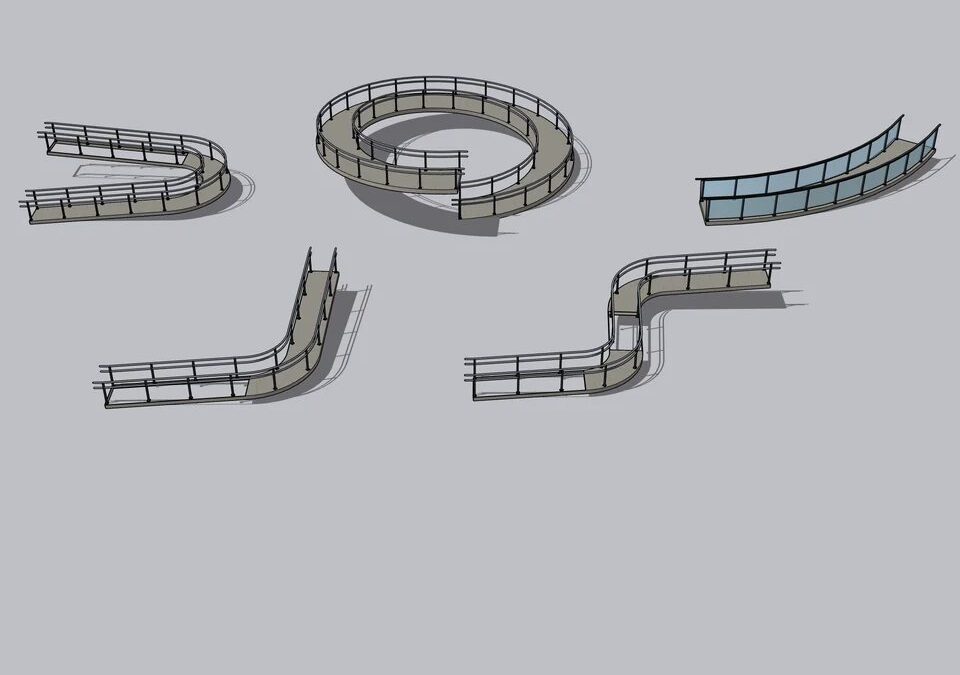
Ramp Studio is path-based. It recognizes straight, L/U/Z, circular, spiral and helix paths. It also offers 8 railing types, curbs and anti-slip strips. Whenever you change a number, the ramp re-solves itself instantly. On top of that, 363 tests run in 19 suites; so what we describe isn’t a promise, it’s tested behavior.
In this article:
- Why doesn’t drawing a ramp ever feel safe?
- What does Ramp Studio, the SketchUp ramp extension, do?
- How much time does it save?
- Who is it for?
- Building your first ramp: step by step
- Compatibility, beta notes and frequently asked questions
Why doesn’t drawing a ramp ever feel safe?
At first glance a ramp is a simple sloped plane. But in a real project the questions line up right away. Is the slope under the limit? If the run got longer, do you need a landing? Do the railing posts sit correctly on the sloped deck?
On a curved path, Follow Me often causes trouble too. The deck tilts sideways and the width changes in the turn. And every time you change the slope, you rebuild the geometry from scratch. A ramp usually starts on a sloped site; we covered the terrain side in our lesson on placing a building on sloped terrain.
What does Ramp Studio, the SketchUp ramp extension, do?
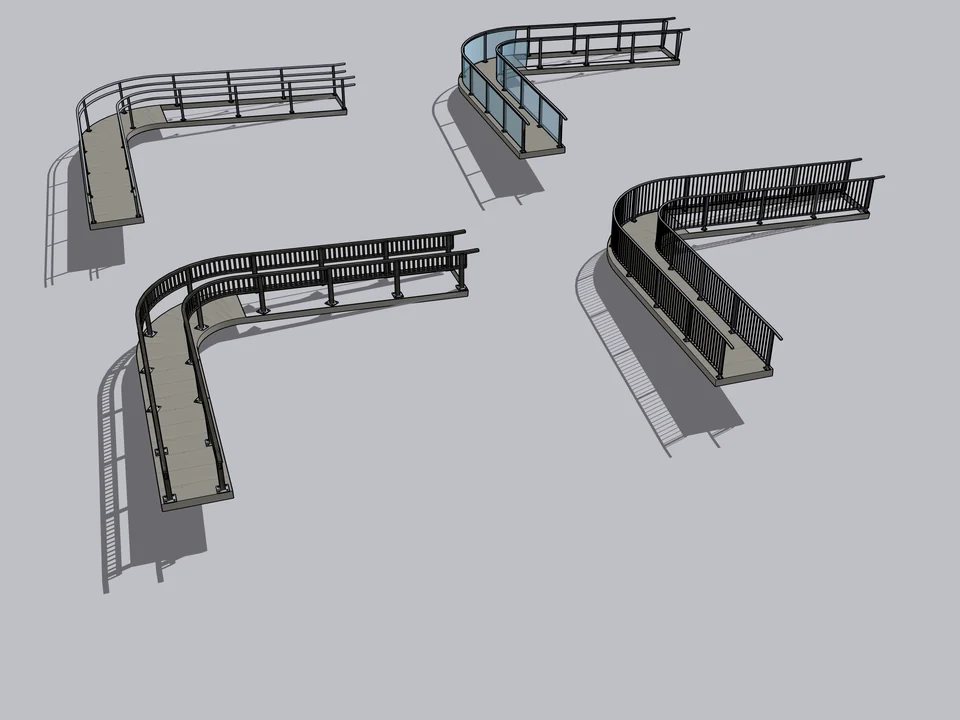
You build a ramp in two ways. The first is to pick any line, arc or curve already in the model. The second is to choose one of the 13 parametric path generators. L/U/Z turns, zigzag, runs with landings, spiral, helix and multi-story options are among them. The extension’s own sweep engine never touches Follow Me. Thanks to that, the deck stays level and the width stays constant even on a helix.
Elevation mode, landings and the Scale tool
Path ramps have three elevation modes: follow the path, fixed slope, and start + end elevation. You also set the landing intervals where the slope drops to zero. For example, if you want a ramp between two levels, you just type the start and end elevations. The path is also stored in the ramp’s own parameters. So even if you delete the source line, the extension rebuilds the ramp.
When you enlarge the ramp with the Scale tool, the extension notices that too. It maps X to length, Y to width and Z to height. Then it regenerates the geometry parametrically. So the SketchUp tools you’re used to work here as well.
Slope in three formats, always in sync
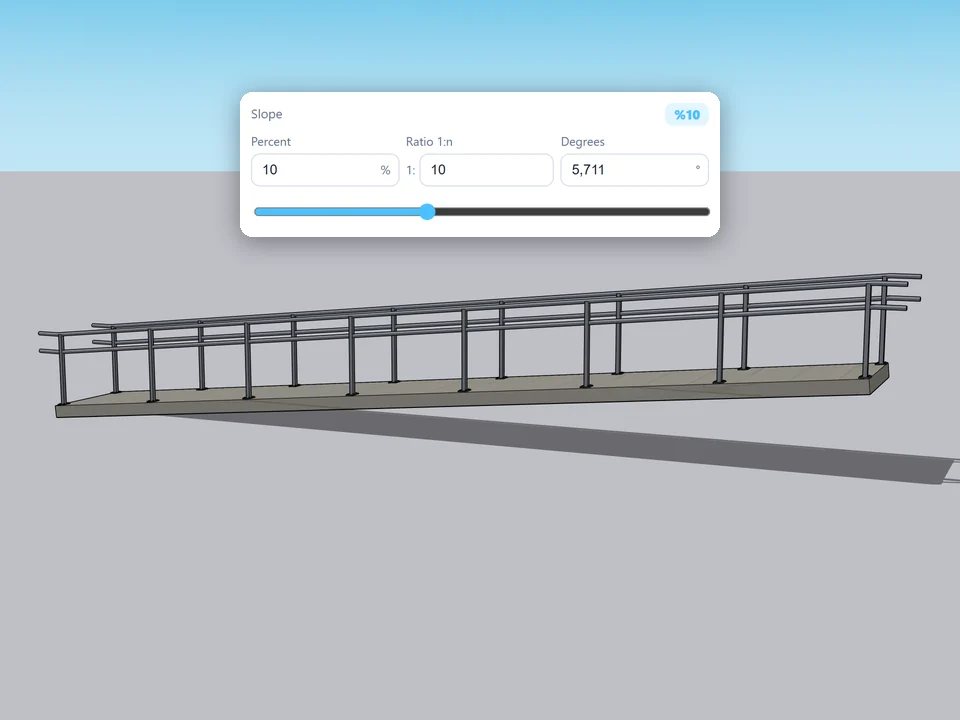
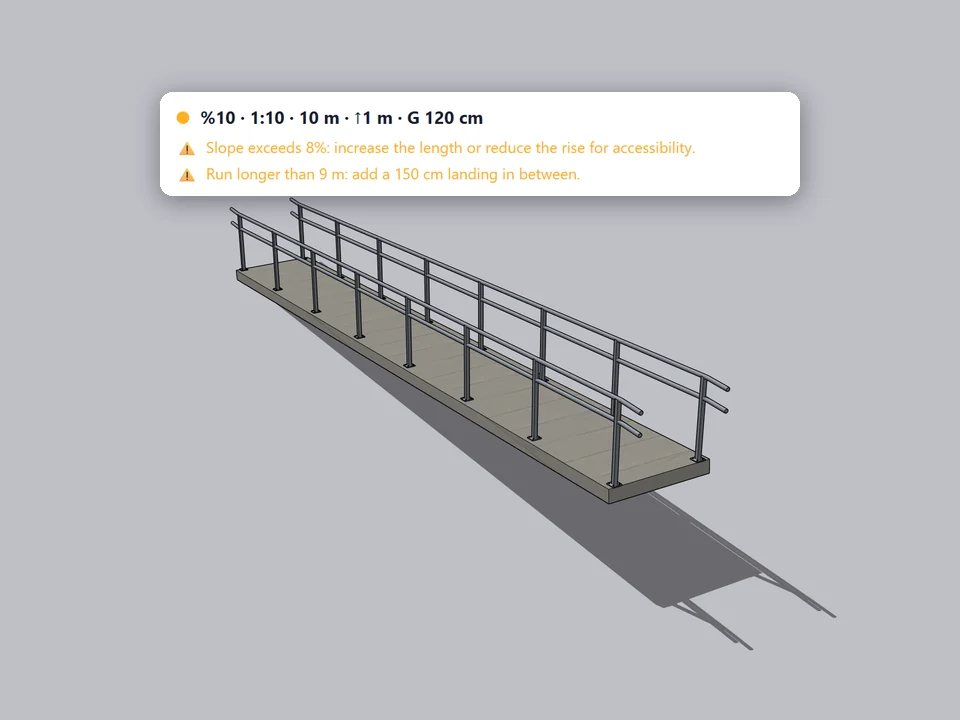
You enter the slope as a percentage (8%), a ratio (1:12.5) or degrees (4.57°). Change one and the other two show the updated value. Width, horizontal run, height and slope also solve each other. You only type the value you know. When a jury asks “what’s the slope?”, the answer is ready in the corner of the screen.
By the rules, without calculations
The extension produces real warnings and errors while you draw:
- An accessibility warning above 8%
- A hard error above 25%
- A narrow width warning
- A required landing on runs longer than 9 m
The info panel also shows the slope, ratio, angle, height, walking distance and landings at a glance. That way you shrink the margin of error at the drawing board.
Railings, curbs and anti-slip strips
There are 8 railing types: metal, glass, tube, double tube, vertical bar, horizontal bar, minimal and wood. Under the posts you can add a square base plate or a round flange with anchor bolts. The handrail end extension defaults to 300 mm. On top of that, 5 edge details are waiting for you: curb, side wall, band, anti-slip strip and expansion joint.
How much time does a ramp extension save in SketchUp?
In the example on the store page, modeling a ramp with railings by hand takes about 45 minutes. With Ramp Studio, you pick a preset, click twice and the job is done in about 40 seconds. So cutting hours of work down to minutes is a real calculation here.
Now let’s spread that over a month. The calculator on the store assumes 12 projects a month. Say you spend 2 hours on ramps in each project. If about 80% of that work moves to the extension, you save about 19 hours a month. That’s close to two and a half working days. Time is your most expensive material; spending those hours on design is up to you.
Also, when you select a ramp, the panel connects to it. Changes to the slope, width or railing go straight into the model. And you can undo the whole session with a single Ctrl+Z. So revisions are no longer a nightmare; you’re free to experiment.
Who is this SketchUp ramp extension for?
- Architects: build an accessible entrance right in the first drawing and show the slope in numbers in the presentation.
- Landscape architects: draw park and garden ramps comfortably on curved paths.
- Interior designers: solve level differences inside shops or offices with short ramps.
- Architecture students: deal with space, not slope calculations, before the jury.
What they all have in common: a ramp looks like a small part of the project, but its mistakes are expensive. And the mistake usually shows up on site, after the concrete is poured. So seeing the slope while you draw prevents a renovation later.
Building your first ramp: step by step
- Install the RBZ file via Extensions › Extension Manager › Install Extension.
- Pick one of the 50 presets in 5 categories, or choose a path generator.
- Click the start point and drag for direction; type the length into the VCB.
- Read the slope, height and landings in the info panel.
- If a warning appears, fix the slope or the path, then choose the railing.
You can type 12m, 1150 or 45cm into the VCB; the extension understands all three. The clearest way to show slope in a presentation is a section; our article on quick sections and plans in SketchUp gives practical tips on this. For details on slope and landing logic, see our accessible ramp guide.
Which versions does the SketchUp ramp extension work in?
Ramp Studio 1.0.0 runs on Windows in SketchUp 2021 through 2026. You can also install it into every SketchUp version on the computer at once with the install.ps1 script. The bundled verifier compares the files in each installation. The interface is in Turkish and English. The license covers a single user and v1.x updates. There’s no online check; the extension works without internet.
You can see the ramped entrance in real light inside SketchUp with our free render engine Render Fun. The reflection on the glass railing looks far more convincing there.
What you need to know about the beta
Let’s be frank: the version is still in beta. The manual test round in SketchUp 2026 is ongoing. No one has verified the macOS side yet. There’s no export code either; for IFC, DXF or PDF you use SketchUp’s own exporters. These outputs are on the roadmap for v1.1 and later.
Frequently asked questions
Does the SketchUp ramp extension replace code approval?
No. The checks are practical warnings based on common thresholds. They are not a certified check against any specific national regulation; always check local regulations before delivery.
Can I use the ramps I create in commercial projects?
Yes. Everything you model is your own geometry, and you can use it in commercial work without conditions.
Can I build a spiral or helix ramp?
Yes. There are spiral, helix and double spiral path generators. The deck stays level and the width doesn’t change.
In short, a ramp is one of the smallest but most questioned parts of a project. If you want to read the slope instead of calculating it, and choose the railing instead of drawing it, take a look at Ramp Studio on its product page.