SketchUp V-Ray Test Render: Low and High Render Settings

A V-Ray test render is the way to check a scene’s lighting quickly before you move on to the final image. Many users take every test with the default settings and wait for minutes. But the default settings are higher than needed for a quick check. In this lesson we save the V-Ray settings as a “lowest” and a “highest” preset. We also show how to save time with region rendering.
 YouTube
We recorded this lesson in 2012. V-Ray’s settings window at the time had sections such as Irradiance Map and Light Cache. In newer versions the interface is much simpler and some sections work automatically. But the “test fast first, then turn up the quality” logic holds in every version. (The video is in Turkish; this guide walks through the key steps in English.)
In this video
- We compare the render times of the default, low and high settings.
- We show which values to lower for testing.
- We save the settings as a preset file.
- We explain which values to raise for the final.
- We calculate only part of the scene with region rendering.
Why does a V-Ray test render matter?
In the video we compare three renders of the same scene. The scene has no bump, reflection or displacement. Even so, the render takes 1 minute 8 seconds with the default settings. With low settings, the time drops to 34 seconds. In other words, the time is cut almost in half.
Of course, quality drops too. For example, the armchair edges get jagged and the shadows get blotchy. But quality does not matter at the testing stage. Here we only look at how the light falls and whether enough light enters the scene. If the light is not enough, we add extra lights on the ceiling or at the window and test again.
Low settings for a V-Ray test render
Explaining the values in detail would take far too long. So we only tell you what to turn down and what to turn up. We do not touch the Global Switches, System, Camera and Environment sections. In a closed interior, you can turn off GI and the background under Environment.
Then we lower these values:
- In the Image Sampler section, we lower Max Subdivs to 4 (or 2 if needed).
- We uncheck the Antialiasing filter.
- In the DMC Sampler section, we bring the relevant sample value down to 4.
- We set the output size to 800×600 or 640×480.
- In the Irradiance Map, we set the Min/Max Rate values to -3 and -2.
- We lower HSph. Subdivs to 30 (or 20).
- In the Light Cache section, we drop Subdivs to around 200.
We do not touch Color Mapping and the other sections. You could actually lower these values even further. But these are the settings that really drive up the time.
Saving the settings as a preset
You will want to reuse these values in different projects. So we press the Save button in the settings window. We give the file a clear name such as “lowest settings”. That way we get back to the same settings in a new scene with one click. If you press the arrow icon, the settings return to their default values.
High settings for the final
When we reach the last stage, we raise the values this time. In the video we work from the bottom up:
- We raise Light Cache Subdivs to between 1200 and 1800; above 1800 it makes little difference.
- In the Irradiance Map, we use values like -4 and -1 for Min/Max Rate.
- We raise HSph. Subdivs to 60, or 80 if needed.
- Under Indirect Illumination, we turn on Ambient Occlusion.
- We set the output to 2048×1600 or a larger size.
- In the Image Sampler, we turn the filter on and set Max Subdivs to 12.
A warning about Noise Threshold
The Noise Threshold value in the DMC Sampler is a very sensitive setting. For example, 0.001 is a very strict value. If you use it, the render takes hours. So around 0.01 is a more balanced starting point.
Then we save the high settings too, under the name “highest settings”. But remember: the same settings do not give the same result in every scene. The result depends on material assignment, light placement and the size of the scene. In other words, settings make a good scene better, but they cannot rescue badly placed lights.
V-Ray test renders with region rendering
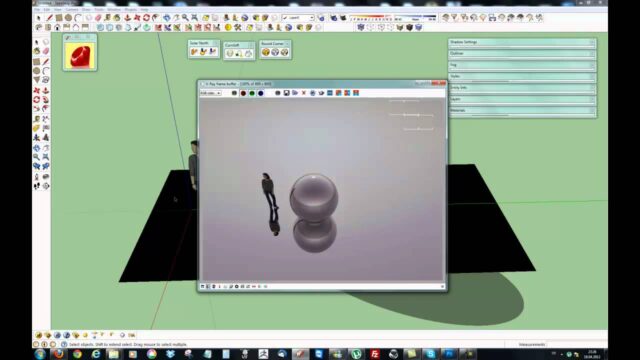
When the scene fills up, rendering the whole frame takes a long time. Instead, we press the Region Render button in the V-Ray Frame Buffer. Then we draw a rectangle on the image. When you press Render, V-Ray calculates only this area.
This small region gives you enough of an idea about the scene’s lighting and materials. In short, you make the right decision without waiting for the whole scene. This habit saves you hours on long projects.
Summary
In this lesson we separated low settings for a V-Ray test render from high settings for the final. For the low settings we used Max Subdivs 4, Light Cache 200, HSph. Subdivs 30 and a small output size. For the final we moved to Light Cache 1200–1800, HSph. Subdivs 60 and a high resolution. We saved both as presets. Finally, we saved time with region rendering.
You can find how render settings are used in interiors in our V-Ray render settings lesson. For other ways to cut render time, see our render time article. For current V-Ray features, the official V-Ray for SketchUp page is the most accurate source.
Frequently asked questions
How low should a V-Ray test render be?
Low enough that you can still see the light distribution. In the video we used an output size between 640×480 and 800×600.
What should Noise Threshold be in the final render?
0.001 is very strict and pushes the time up to hours. Around 0.01 is a more balanced starting point.
Does region rendering affect final quality?
No. Region rendering only calculates the area you select. For the final, you render the whole frame again.