
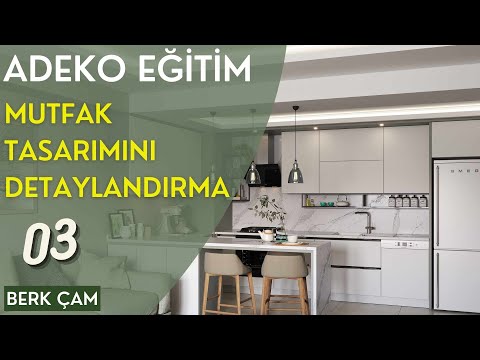
Adeko Basics Series: Detailing the Kitchen Design 03

Adeko Basics Series, detailing the kitchen design: in this part we add detail to our kitchen model inside Adeko and continue with materials and other key parts.
Don’t forget to share the video with your friends who use Adeko.
Enjoy the lesson.
 YouTube
What’s in this video?
This part is the third lesson of our basics series. In the earlier lessons we got to know the interface, then placed the window and the modules. Now we add detail on top of the finished layout. The video covers these topics: (The video is in Turkish; this guide walks through the key steps in English.)
- Starting to detail the kitchen model.
- Assigning materials to surfaces.
- Moving on to the other key parts that complete the design.
Once the detailing is done, the kitchen is quite close to what you will present to the client. That is why we see this part as one of the key turning points of the series.
Who is it for?
We made it for designers who are just starting to draw kitchens with Adeko. People who draw in furniture workshops and interior design students can also follow the series easily. The video runs about 10 minutes, so you can watch it comfortably even on a short break. If you watch the series in order, you connect the topics more easily, because each part builds on the previous one.
Before you watch
Adeko is a program for kitchen and furniture design. We build the kitchen with ready-made modules, then adjust those modules to the dimensions and requirements. In this lesson we mostly work on materials. A material here means the image of a finish we assign to a surface. That is how we give a surface a wood, marble or lacquer look.
The scale of the pattern matters in materials too. For example, a wood finish with grain that is too large or too dense looks unrealistic. So we recommend checking up close after assigning a material. Keep your own project open while you watch the video. That way you can try each step in your own kitchen right away.
Why does detailing matter in the Adeko series?
The module layout is like the skeleton of the kitchen. Detailing turns that skeleton into the kitchen the client will actually see. For example, the same layout takes on a completely different feel with a different door color and countertop choice.
At this stage we usually pay attention to these points:
- How the door, carcass and countertop colors work together.
- Keeping the grain direction consistent across the doors on wood-pattern finishes.
- Thinking about surfaces like the walls, floor and backsplash together with the kitchen.
- Checking the dimensions one last time before adding details.
- Planning the camera for the view you will present to the client from the start.
The more detail you add, the heavier the model gets and the harder it is to go back. So locking in the dimensions and layout before the details makes your job easier.
What do we mean by detail in a kitchen?
Detailing is all the small but visible parts that make the modules look like a real kitchen. At this stage we usually go through these parts one by one:
- Plinth: the strip that covers the legs of the base cabinets.
- Side panels: finished panels that cover the exposed sides of cabinets.
- Closing off the gap between the wall cabinets and the ceiling, or leaving it open.
- Handle type: classic handles, recessed handles or handleless profile systems.
- Countertop material and edge detail.
- Under-cabinet lighting and socket positions.
These parts may be small, but they directly define how finished the kitchen feels. And at the manufacturing stage, each one shows up as a separate order and installation item.
How does the series progress?
We can summarize the lessons on the site in order like this:
- Getting to know the interface.
- Placing the window and the modules.
- Detailing the kitchen design, which is this lesson.
- Continuing with handles and detailing.
- Developing the kitchen modules and detailing the kitchen.
- Exporting the file to SketchUp, editing it and preparing it for rendering.
Since the last steps move to SketchUp, we recommend looking at the basic tools there too. The SketchUp Help Center is a good reference for that.
Related lessons
- Getting to know the interface: the first part of the series.
- Placing the window and modules: the part right before this lesson.
- Kitchen handles and detailing: the continuation of this lesson.
- Exporting the file to SketchUp: the part where we move the model to SketchUp.
- Preparing the exported model for rendering: one of the last steps in the series.
If you want to move on to rendering, take a look at our render guide.
Frequently asked questions
Can I export a kitchen I drew in Adeko to SketchUp?
Yes. In the eighth part of the series we show how to export the file to SketchUp. In the following parts we edit the exported model.
When should I move on to detailing?
We recommend moving on once the module layout and dimensions are settled. That way you do not have to do the details twice.
What should I look for when choosing materials?
First decide on the overall tone the client wants. Then narrow down your choice by looking at the door, countertop and wall surfaces together.


