Create a High-Quality Interior Scene in Twinmotion 2022

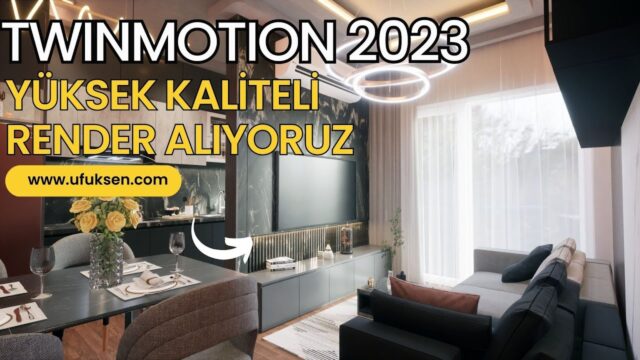
In this lesson we try a different technique for Twinmotion scene setup. We get high-quality results in interior design and visualization with Twinmotion 2022. Instead of modeling from scratch, we work with a ready-made interior scene. That way we can give all our attention to light, materials and quality.
We get the most impressive results from Twinmotion 2022 with path tracing. This method calculates how light behaves in the scene far more realistically. As a result, we go a step beyond the real-time view and reach near-photographic quality.
Twinmotion scene setup lesson video
The video runs about 18 minutes. For more lessons, you can subscribe to our YouTube channel.
 YouTube
Why work with a ready-made scene?
When you are learning visualization, modeling and rendering at the same time is exhausting. A ready-made scene takes that load away. You focus directly on image quality without dealing with model dimensions or wall thicknesses. This helps you understand light and material settings faster. (The video is in Turkish; this guide walks through the key steps in English.)
Ready-made scenes also serve as a good reference. Studying how a professional scene is organized adds a lot to your own projects. For example, you get ideas about furniture layout, how many accessories to use and camera angles.
Twinmotion scene setup steps
As a general method, we set up a high-quality interior scene in this order:
- Open the scene: Load the ready-made interior scene into Twinmotion and study the overall layout.
- Review the materials: Adjust the reflection and roughness values to suit the space.
- Set up the light: Balance the sun angle and the strength of the artificial lights.
- Place the camera: Choose an angle that shows the strongest part of the space.
- Switch to the Path Tracer: Save the final image in this mode, at high quality.
What is path tracing?
Path tracing is a render method that follows the path of each light ray through the scene. Light hits a surface, bounces and lights up other surfaces. This method takes all those bounces into account. That is why shadows, reflections and indirect light look much more natural.
Real-time mode is fast, but it approximates some lighting details. Path tracing takes longer, but in return it gives a much more realistic result. So work in real-time mode. For the final image, switch to path tracing mode.
Path tracing needs a graphics card that supports ray tracing. Check the current hardware requirements on the official Twinmotion website.
Lighting during Twinmotion scene setup
The secret of a high-quality interior is balanced light. Make the daylight coming through the windows your main source. Then add soft artificial lights to the dark areas. But do not light every corner evenly. A bit of shadow adds depth and character to the space.
In path tracing mode, the effect of light is more pronounced. A glossy floor, for example, bounces the light from the window onto the ceiling and walls. So check the light strength once more in the final mode and lower it if needed.
Quality differences in materials
In a high-quality scene, material detail catches the eye right away. The grain of the wood, the texture of the fabric and the roughness of the stone decide how convincing the image is. So replace low-resolution textures with better ones. Also avoid perfectly smooth surfaces, because in the real world every surface has a little roughness.
Camera and framing
A high-quality scene comes to life with the right camera. A camera at eye level usually gives the most natural result. Also make sure vertical lines stay straight. Put the strongest part of the space at the focus of the frame. For example, showing a seating area together with the window behind it adds depth. Finally, save a few different angles of the same scene so you can offer options in the presentation.
Next steps
For a simpler, faster method, see our easy interior render with Twinmotion 2022 lesson. We reviewed the new features that came with that version in our Twinmotion 2022 new features article.
You can also reach us on our Instagram account about your designs and visualization work. You can get feedback by sharing your work in our Facebook group, too.
If you want to take this topic a step further, take a look at our Interior Visualization Tutorial with Twinmotion and Create a Winter Scene in 5 Minutes with Twinmotion 2022 articles. You can reach all the lessons in order through our SketchUp render guide.
Frequently asked questions
Do I need a ready-made scene for Twinmotion scene setup?
No, you can apply the same steps to your own model. But while you are learning, a ready-made scene makes the job much easier.
Does path tracing work on every graphics card?
No, path tracing needs a graphics card that supports ray tracing. Check your card’s compatibility against the requirements on the official website.
Which version was the lesson made with?
We made the lesson with Twinmotion 2022. The interface may change in newer versions, but the logic of setting up a scene is the same.