The SketchUp Outliner Model Tree: Finding and Naming Groups


The client calls and says, “Let’s make the bathroom cabinet on the second floor a little narrower.” So you start hunting for that cabinet in the model. You hide walls, open groups, select the wrong object. Yet the SketchUp Outliner panel cuts this search down to a few seconds. It lists every group and component in the model in a single tree, by name.
We have been teaching SketchUp for eighteen years. On big projects, what wastes the most time is not drawing but searching. Looking for the right part among hundreds of unnamed groups takes patience. Someone who uses the Outliner regularly, on the other hand, finishes a revision in minutes. Sending the client a new presentation the same day gets easier too.
In this article:
- What is the SketchUp Outliner and where is it?
- Giving groups and components the right names
- The search box and sorting options
- Organizing the model tree with drag and drop
- A tidy model tree, step by step
- Frequently asked questions
What is the SketchUp Outliner, and where is it?
The SketchUp Outliner is like a table of contents for your model. The panel shows groups, components and section planes as a tree. A small arrow appears next to nested objects. When you click the arrow, you see what is inside that container.
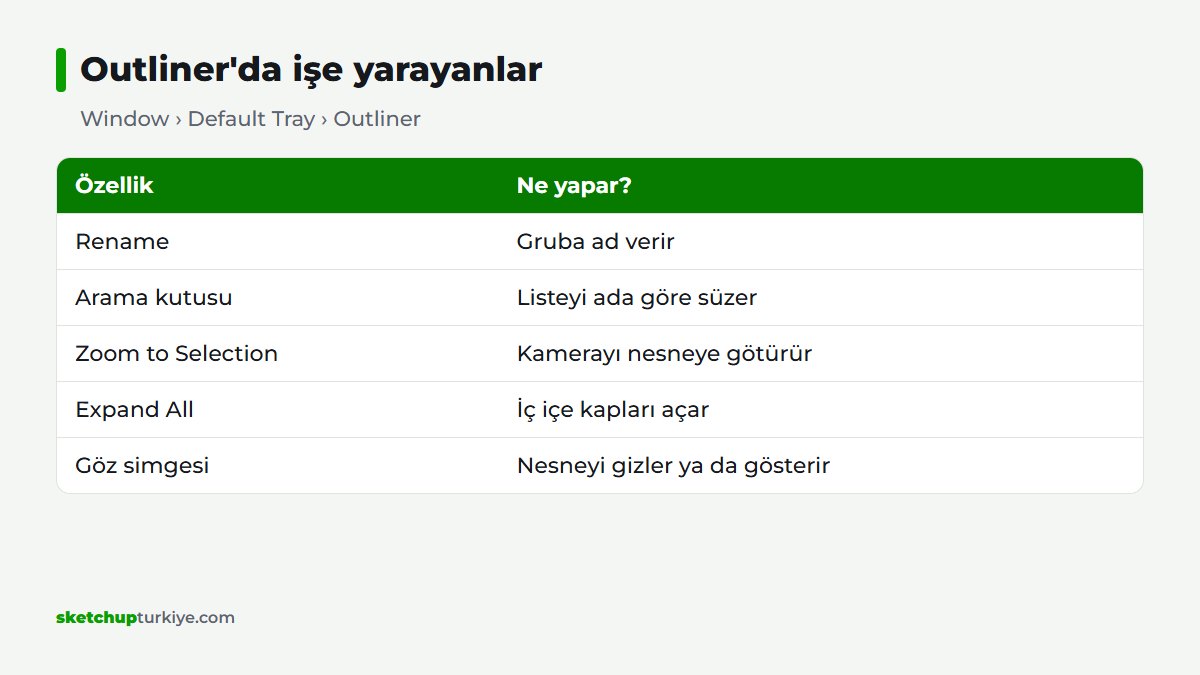
To open the panel, go to Window › Default Tray › Outliner. The panel sits in the tray on the right with the other panels. That way you can open and close it whenever you like.
Raw edges and faces do not appear in this list. Only objects you have put in a container show up. That is why the Outliner really pays off in an organized model. We explained the logic of containers in detail in our group vs. component article.
Why does naming matter so much in the SketchUp Outliner?
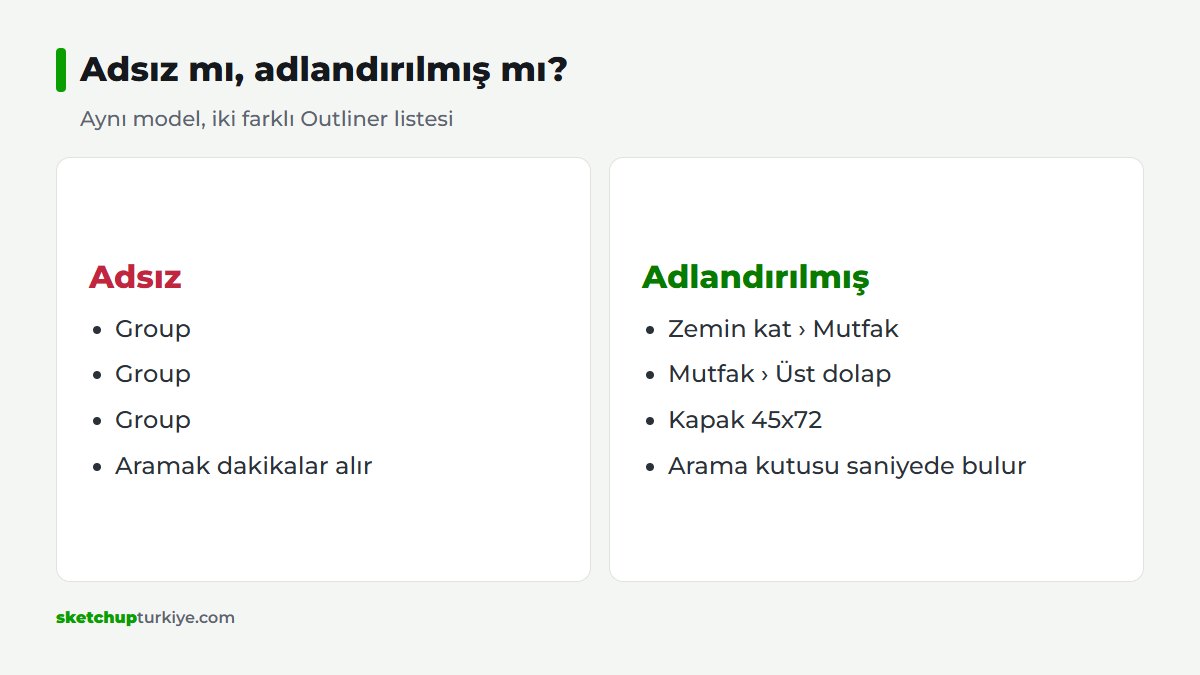
An unnamed group appears in the list only as “Group”. A hundred “Group” rows tell you nothing. A row that says “Ground floor walls”, however, is different. It shows you what you are looking for at first glance.
Luckily, naming a group is easy. In the Outliner, right-click the row and choose Rename. Then type the new name and press Enter.
With components, though, things are a bit different. A component’s name belongs to its definition. When you rename the definition, every copy in the model takes the new name. For example, if you change “Front 60” to “Front 60 white”, twelve cabinet fronts take the new name at once.
How do you use the search box and sorting?
There is a search box at the top of the panel. When you type “cabinet” here, the list shows only objects with that word in their name. That way you do not get lost among hundreds of rows. When you find what you are looking for, click the row; the object is selected in the model too.
The search box also lists component copies. For example, when you type “front”, you see every copy with that word in its name. This tells you at a glance how many fronts there are on each floor. When you are done searching, clear the box; the list returns to its full form.
Selection also works both ways. For example, when you select an object in the model, the Outliner highlights its row. And if you right-click a row and choose Zoom to Selection, the camera goes straight to that object. This is the fastest way to find a part in a far corner.
The Details menu in the panel makes your work even easier. Expand All opens every nested container. Collapse All closes them all. In the Sort By field, you sort the list by hierarchy or by tags.
The SketchUp Outliner together with tags
The Outliner tells you what is where. Tags, on the other hand, manage what is visible. When you set up both together, even a big model stays simple. We covered the tags side in our organized model with tags guide.
Organizing the model tree with drag and drop
The Outliner is not just a list. You can drag rows and drop them inside another container. That way you move a group into another group. For example, you gather three scattered cabinets under a “Kitchen” group.
You can also hide things from here. When you click the eye icon next to a row, the object and its contents are hidden. Click again and it comes back. That way you can hide the walls and work comfortably in the interior.
The icons also tell you the state of the object. Open, closed, locked and hidden containers appear with different icons. When you accidentally try to edit a locked group, this icon warns you.
Step by step: a tidy model tree with the SketchUp Outliner
We apply the order below on every new project in our lessons. This habit of a few minutes saves hours over the course of a project.
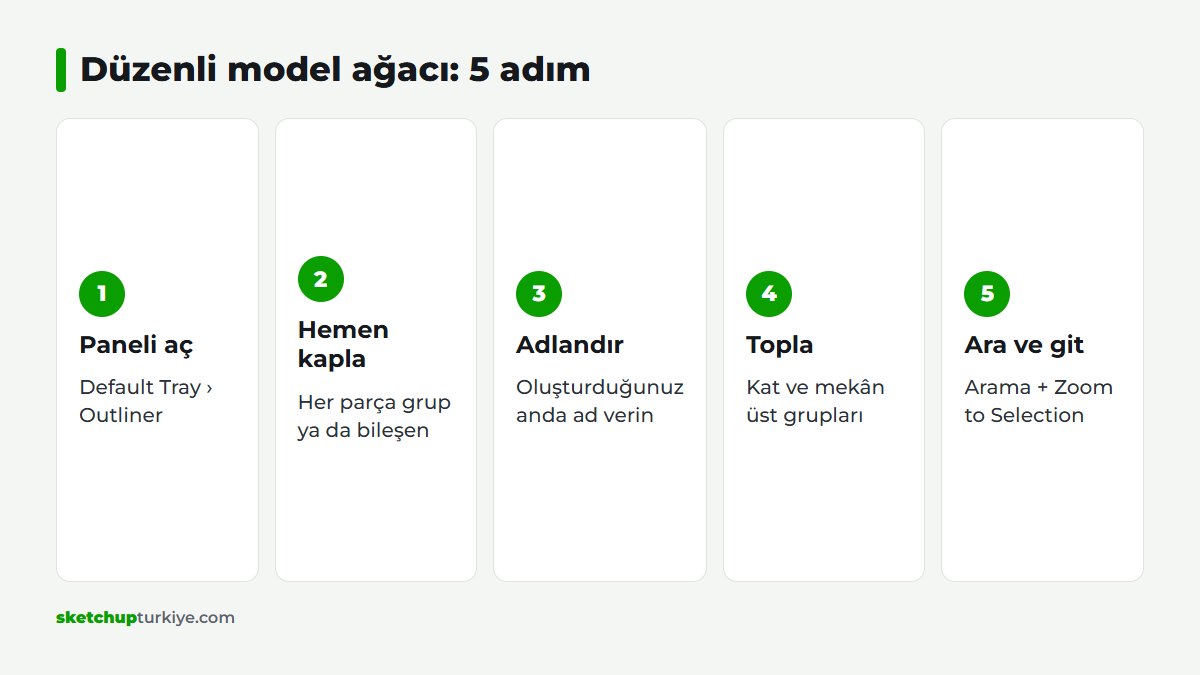
- Open the panel with Window › Default Tray › Outliner.
- Make every part you draw a group or component right away.
- Give the group a clear name the moment you create it.
- Gather floors or rooms in separate top-level groups.
- Drag scattered parts and drop them under the right top-level group.
- During a revision, type the part’s name in the search box.
- Go to the part with Zoom to Selection and edit it.
This order is especially useful when you hand the file to someone else. When your teammate opens the model, they see right away what is where.
How do you set up a SketchUp Outliner structure on a big project?
A few groups are enough for a small kitchen model. But a three-story villa has hundreds of containers. So on a big project, decide on a naming system first. Then stick to it throughout the project.
In our lessons we recommend a three-level system. Floors sit at the top: “Basement”, “Ground floor”, “1st floor”. Rooms come one level down: “Living room”, “Kitchen”, “Bathroom”. At the bottom are the parts: “Wall cabinet”, “Countertop”, “Sink”.
Adding the dimensions to component names also helps a lot. For example, the name “Front 45×72” tells you right away which part it is. That way you do not mix up similar fronts. And when counting, you can read how many of each size there are from the name.
Short prefixes also speed up searching. For example, start all landscape groups with “P-“. Then, when you type “P-” in the search box, only the landscape is listed. You can use the same method for furniture or building services too.
In teamwork, a shared naming system matters even more. If everyone in the office uses the same floor and room names, the models look alike. That way, when someone goes on leave, someone else picks up the work where it was left off.
Finally, try to set up the structure at the start of the project. Naming a finished model afterward takes hours. Naming each group the moment you create it, on the other hand, takes only a few seconds. Time is your most expensive material; do not spend it hunting for unnamed groups.
What else is an Outliner structure good for?
A tidy tree also speeds up boolean work. For example, when you need to cut an opening in a wall, you select the wall group from the list instantly. We covered this in our Solid Tools guide.
Named components also make quantity takeoffs and counting easier. You track how many of each part there are by name. For all the details of the panel, see SketchUp’s Outliner help page.
Frequently asked questions
Why are some objects missing from the SketchUp Outliner?
The Outliner lists only groups, components and section planes. It does not show edges and faces that are not in a container.
If I rename a component, do all the copies change?
Yes. The name belongs to the component’s definition. So when you rename the definition, every copy takes the new name.
Does the Outliner slow down SketchUp in a big model?
In very large models, keeping the panel open makes the screen a bit heavier. In that case, close the panel when you are done.
A model full of unnamed groups steals your time on every revision. Tonight, open the Outliner in your current project and name the ten biggest groups. Then name every new group the moment you create it. Set it up once, use it on every project.