Exterior Composite Cladding Tutorial


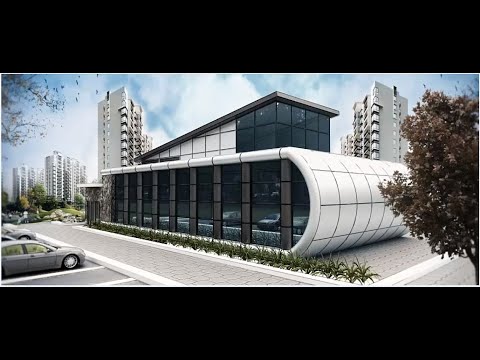
In our composite cladding tutorial series, we work on a building with a composite facade in SketchUp and V-Ray. We start from modeling and go all the way to the render stage. Earlier we shared lessons on interior bathroom modeling and V-Ray rendering. This time we present the exterior composite cladding series prepared by our friend Ahmet Fatih. The series has 18 lessons today and covers many details.
Composite panels are one of the cladding types we see most often on modern facades. With their smooth surfaces, sharp joints and wide range of colors, they give a building a contemporary look. That is why modeling the facade correctly and rendering it realistically is an important skill in architectural visualization.
Composite cladding tutorial video list
All the lessons are in a single playlist. We recommend watching them in order.
 YouTube
Which lessons are in the composite cladding tutorial?
- Lesson 01 – Introduction: We introduce the scope of the series and the path we will follow from modeling to the render stage.
- Lesson 02 – Composite panels: We create the composite panels and look at different detail points.
- Lesson 03 – Composite columns: We create the composite columns and look at different detail points.
- Lesson 04 – Facade details: We start modeling the building’s facade details.
- Lessons 05–09 – Detailing: We enrich the facade step by step with different details.
- Lessons 10–18 – Continuation and finale: In the playlist the series runs to 18 lessons; we complete the facade and bring the model to its final form.
What to watch for when modeling a composite facade
How realistic a composite facade looks depends largely on the joints. The thin gaps between the panels give the facade rhythm and scale. So if you do not show the joints in the model, the facade looks like one piece and artificial. (The video is in Turkish; this guide walks through the key steps in English.)
- Panel size: Divide the panels to match real sheet sizes.
- Joint width: Keep the joints thin and consistent, the same width everywhere.
- Corner joints: Carefully model how the panels turn at the corners.
- Using components: Make repeating panels components to keep the model light.
Composite cladding tutorial: rendering with V-Ray
When the modeling is done, materials come next. Composite panels are usually slightly glossy materials with a smooth surface. So you need to keep the reflection moderate in V-Ray. A material that is too glossy makes the facade look like plastic.
On the lighting side, the sun angle is decisive. Sunlight coming from the side brings out the shadows in the joints and adds depth to the facade. We explained exterior render settings in detail in our V-Ray exterior facade render settings lesson. For the current version of V-Ray, see the V-Ray for SketchUp page.
Who is it for?
In general, the series suits anyone who knows SketchUp’s basic tools and wants to move into exterior visualization. It is especially useful for architects and interior architects who work on facade design. Companies that install composite cladding also use this method when preparing presentations for their clients.
If you want to continue exterior modeling with a different example, take a look at our exterior modeling series. The first version of this topic that we published is in our V-Ray exterior composite set article.
Tips for watching the lessons
After each lesson, apply the same steps to your own model. For example, start with a simple box building and divide the facade into composite panels. Then add the joints and corner joints. That way, by the end of the series you will have finished your own facade project.
Preparing the presentation after the composite cladding tutorial
Once the facade model and render are done, you can move on to the presentation stage. At this stage, showing the same building in different color options is very useful. For example, compare anthracite, white and wood-pattern panels. The client can then make a decision much more easily by looking at the images.
Also prepare one image in daylight and one in evening light. Composite surfaces take on different tones in different light. A close-up detail image also highlights the quality of the panel joints. In the end, a few carefully prepared images are more convincing than long explanations.
When you finish this series, you will have learned not only composite facades but the logic of exterior facade modeling in general. You can apply the same approach to facades clad in stone, ceramic tile or wood. That is because panel layout, joints and corner details work in a similar way for every type of cladding.
Frequently asked questions
How many lessons are in the composite cladding tutorial?
The series has 18 lessons today. It covers every step from modeling to the render stage.
Who made the lessons?
The series was prepared by our friend Ahmet Fatih. We thank him for his contribution.
Why does my composite facade look fake?
Most likely the joints are missing or the material is too glossy. Model the joints and reduce the reflection.